Introduction
In this tutorial I am going to take you through the process of using MPEG Streamclip to create proxy files for editing in Adobe Premiere. MPEG Streamclip is an amazingly powerful piece of software that is completely free. You can download it here. The one minor downside is that you need a particular version of Quicktime for it to work. Follow the instructions on the Square 5’s website and it will soon be up and running.
Step 1. Folder Structure
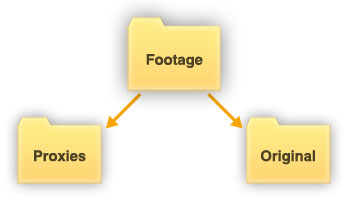
Create a new folder on your PC where you want to keep all your project video files. Call this new folder Footage.
Within this Footage folder create two more folders. These will be where you keep your original footage and your new proxy files. Name the first folder Proxies and the second folder Original.
Step 2. Populating Folders
Copy all your camera video files to the Original folder. It is important to never delete or overwrite these files. You will always want to be able to access your original high quality files.
Step 3. MPEG Streamclip
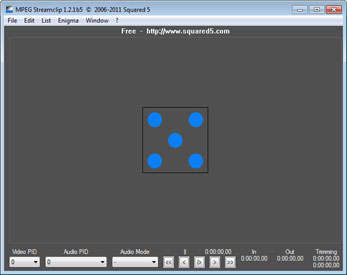
Open MPEG Streamclip where you will be greeted with a window like the image on the right. File navigation is along the top, a big video preview window in the middle and video controls along the bottom.
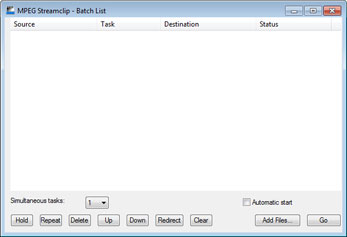
To add video files so you can start exporting them to proxy files click the List menu at the top of the window and then select Batch List. Or if you are short on time and like using shortcuts simply hit CTRL + B.
Step 4. Importing Video Files
A new Batch List window will open. To populate the Batch List click the Add Files… button which can be found at the bottom right of the window.
A new window opens, this time navigate to your Original folder and select all the video files you want to convert to proxy files. Once all your video files are selected click Open.
Step 5. Export to DV
This is where it starts to get a little technical and a knowledge of codecs, compression, file types and formats is helpful, I will keep it light on detail.
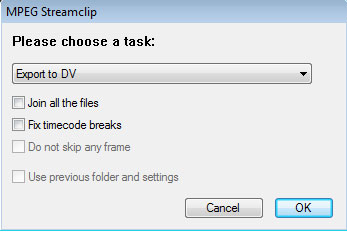
Click the drop down menu and select Export to DV. Premiere LOVES the DV format so most computers can handle this codec. The one downside is large file size. Click OK to bring up the next window. Navigate to your Proxies folder and click OK to save them there.
Step 6. Proxy File Settings
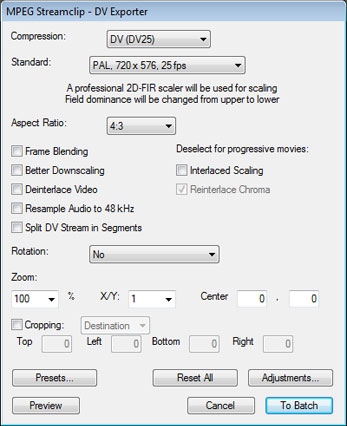
This final window may look confusing but very little needs changing. Select DV (DV25) from the Compression drop down menu. If from Europe select PAL from the Standard drop down menu or NTSC if your American.
My original video files were filmed at 1280×960 with a GoPro so I selected 4:3 for my Aspect Ratio. If you have filmed at 1280×720 or 1920×1080 you should select 16:9 for the Aspect Ratio. If unsure a general rule is if your original video files are shaped like a letterbox select 16:9 but if shaped more like a squashed square select 4:3.
The final setting is to deselect the Interlaced Scaling box to make your proxy files progressive. This means the final output will be for a computer display such as YouTube or Vimeo.
Click To Batch to start creating your proxy files. If MPEG Streamclip does not automatically start creating your proxy files simply click Go. It is now time to wait whilst MPEG Streamclip does it’s thing and create your proxy files.
Step 7. Editing with Premiere
Open Adobe Premiere, create a new sequence and hit CTRL + I to import your video files. Navigate to your Proxies folder, select all your proxy files and click Open. The aspect ratio of the proxy files is 720×576 which will likely be much smaller than the original footage, do not worry, this is fine. The proxy files will also probably not fill the whole of the editing window, again do not worry. Time to start editing.
Step 8. Replacing Proxy Files with Original Files
Once happy with the sequence it is time to export the final video file. Before clicking Export navigate back to your original Footage folder. Simply rename the Proxies folder to Replaced and the Original folder to Proxies. Premiere will still be taking the files from the Proxies folder but they are now the original files at full resolution not the low resolution proxy files. Amazing!

